
SMED — Single-Minute Exchange of Die — is the most direct lever food operations managers have for cutting changeover time, with a practical target of under 10 minutes per changeover. The method works by separating tasks that require the line to stop (internal) from tasks that can run while the machine is still producing (external), then converting as many internal tasks to external as possible. Your immediate next step: time one representative changeover with a stopwatch, break it into individual tasks, and identify the two longest internal steps. Those two tasks are your pilot targets.
Before you convert anything, flag every sanitation and allergen step in that task list. Some of those steps must stay internal — they cannot be moved outside the machine stop without a food-safety violation. Plan around them, not through them.
Table of Contents
- What is SMED and why does it matter for food lines?
- What are the real benefits of SMED for food manufacturers?
- How to implement SMED on a food production line: 5 steps
- What do you need before starting a SMED pilot?
- What does a real SMED result look like in food production?
- Which tools and fixtures actually work on food lines?
- How do you measure whether SMED is working?
- What challenges should you expect when running SMED in food plants?
- Your line changeover checklist for a SMED pilot
- Key Takeaways
- The part of SMED that most food plants get wrong
- Gembalabs helps you measure and sustain SMED gains
- Useful sources for further reading
What is SMED and why does it matter for food lines?
Shigeo Shingo developed SMED at Toyota in the 1950s and 1960s to reduce die-change times on stamping presses from hours to single-digit minutes. The name is slightly misleading: "single-minute" means the changeover target is a single-digit number of minutes, not literally one minute. Food manufacturers adopted the methodology decades later, and it fits high-mix, short-run food operations particularly well because the cost of a two-hour allergen changeover on a snack line is far more visible than a slow die swap ever was.
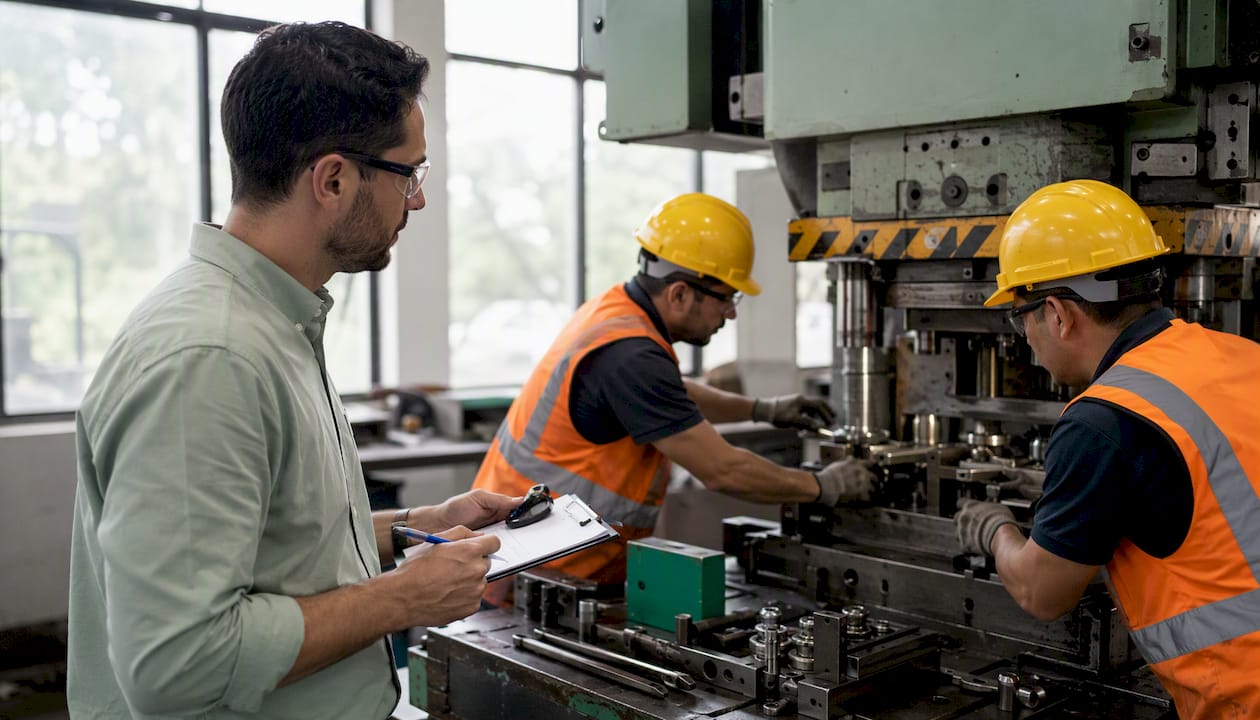
The two concepts you must internalize before anything else:
Internal tasks require the machine to be stopped. You cannot do them while the line runs. On a food line, these include mechanical part swaps, CIP (clean-in-place) cycles, allergen rinse validation, and first-article QA checks.
External tasks can be completed while the line is still producing. Pre-staging ingredients, pre-heating sealing heads, mixing sanitation chemicals, and printing batch paperwork are all candidates.
The SMED methodology in food adds a layer that pure mechanical applications never needed: sanitation, allergen segregation, and ingredient handling are often the dominant time drivers, and they carry regulatory weight. That changes how you apply each principle.
Core SMED principles adapted for food production:
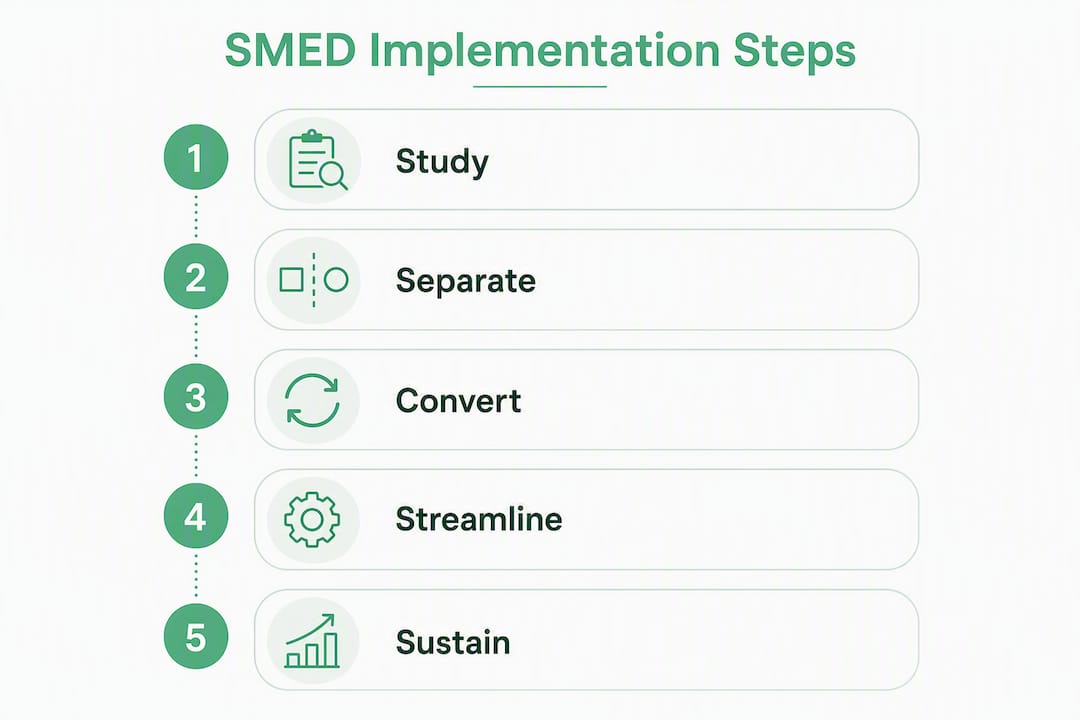
- Identify: Document every task in the current changeover, including sanitation steps, allergen swabs, and QA holds. Nothing is assumed to be fast.
- Separate: Classify each task as internal or external. Flag any task with a food-safety constraint before reclassifying it.
- Convert: Move external-eligible tasks outside the machine stop. Pre-stage, pre-heat, pre-mix. Protect allergen validation and CIP cycles as internal.
- Streamline: Reduce the time of remaining internal tasks through quick-release hardware, standardized tools, and simplified SOPs.
- Standardize: Lock the improved sequence into written standard work, visual controls, and operator training.
- Sustain: Audit regularly, run PDCA cycles, and use real-time data to catch drift before it becomes habit.
SMED has been applied successfully across bakeries, dairies, beverage lines, and snack facilities, cutting changeovers from hours to minutes in documented cases. The principles transfer across sub-sectors; the food-safety overlay is what makes each application unique.
What are the real benefits of SMED for food manufacturers?
The most direct impact is on changeover time itself, which cascades into every other production metric. A ready-meal manufacturer applying SMED reduced changeover time by nearly 30%, increased OEE to over 70%, and cut labor costs by approximately 10%. A separate study combining value stream mapping and SMED in food processing reduced changeover time by 34% and increased main-line capacity by 11%, eliminating the need for temporary workers during peak periods. A conference-reported implementation reduced total changeover time by approximately 39% with measured improvements in throughput and safety.
Those numbers translate into operational benefits that matter to managers:
OEE and effective capacity. Shorter changeovers mean more available production time per shift. A line running four changeovers per day at 45 minutes each loses three hours of capacity. Cut that to 30 minutes and you recover an hour per shift without adding headcount.

Lot size and SKU agility. Long changeovers force large minimum runs to justify the downtime cost. Shorter changeovers let you produce smaller, more frequent runs, which reduces finished-goods inventory and lets you respond faster to demand changes or promotional SKUs.
Quality and allergen control. Standardized changeover sequences reduce the chance of missed steps. When every allergen rinse and QA swab is written into standard work and timed, the rate of QA holds drops and root-cause analysis after a failure becomes faster because the sequence is documented.
Labor cost. Changeover labor is often the least visible cost on a food line. When changeovers run long, operators wait, maintenance scrambles, and QA holds up release. Tighter sequences reduce idle time and overtime.
On-time delivery. Faster changeovers mean shorter lead times and more scheduling flexibility, which directly supports on-time delivery performance.
How to implement SMED on a food production line: 5 steps
Step 1: Study the current changeover
Film or observe at least three complete changeovers on the target line. Use a stopwatch and a simple task log: task name, start time, end time, and who performs it. Three observations give you enough variation to identify the consistent time drivers versus the one-off delays.
Involve QA from the start. Every sanitation step, allergen swab, and release hold needs to be in the task log with its actual duration, not an estimated one. QA steps that "only take a few minutes" often run 15–20 minutes when you time them honestly.
Value stream mapping alongside the stopwatch method gives you a fuller picture of where time is lost across the whole line, not just at the changeover point.
Step 2: Separate internal from external tasks
Once you have the task log, go through each item with your cross-functional team and classify it: internal (line must be stopped) or external (can be done while running). Use a simple color code on the task sheet — red for internal, green for external, yellow for tasks that need further review before reclassifying.
Practical examples on food lines:
- Internal (must stay): CIP cycle, allergen validation swab, mechanical part swap, first-article weight check, safety lockout/tagout
- External (can move): Pre-staging ingredients, pre-heating sealing heads, mixing sanitation chemicals, printing batch records, staging spare parts and tools
- Yellow (review required): Any cleaning step that touches allergen contact surfaces — these need QA sign-off before you move them
Sanitation and allergen tasks are often the critical path and cannot always be externalized. Protect them in the standard work before you optimize anything else.
Step 3: Convert internal tasks to external
This is where the time savings come from. For every task marked green or under review, ask: what preparation can happen before the line stops?
Tactics that work on food lines:
- Pre-staging: Load the next ingredient batch, packaging format, or label roll before the current run ends.
- Pre-heating: Start heating sealing heads, ovens, or fryers to the target temperature during the last 15 minutes of the current run.
- Parallel checks: Run QA paperwork review and batch record setup while the line is still producing.
- Checklist handoffs: Give the incoming operator a completed pre-changeover checklist so they start the mechanical sequence immediately, not after a verbal briefing.
Food-safety guardrail: Never convert a step that involves allergen contact surfaces or CIP validation without written QA approval. The time savings from moving a step outside the machine stop are worthless if they trigger a recall.
Pro Tip: Pre-heating sealing heads is one of the single largest time savers on ready-meal and packaging lines. If your current process starts the heat-up after the line stops, you are leaving significant minutes on the table every changeover.
Step 4: Streamline remaining internal tasks
Once you have moved everything movable outside the machine stop, focus on making the remaining internal tasks faster and more reliable.
- Quick-release fixtures: Replace threaded fasteners with quarter-turn clamps, cam locks, or tool-free snap fittings on parts that are swapped every changeover.
- Standardized tools: Keep one dedicated changeover tool kit at the line, pre-set to the correct torque specs, so operators are not hunting for wrenches.
- Simplified SOPs: Rewrite changeover instructions as visual one-page job aids with photos, not paragraphs of text.
- Poka-yoke: Add physical guides, color-coded connectors, or keyed fittings that make it impossible to install the wrong part or connect the wrong ingredient line.
Combining SMED with 5S, standardized work, and visual management produces more durable results than SMED alone. The lean tools stabilize the gains; SMED creates them.
Step 5: Sustain and standardize
The most common failure mode in SMED is a successful pilot that quietly reverts to old habits within 90 days. Prevent it with:
- Standard work documents locked into the QMS and reviewed at each audit cycle.
- Visual controls at the line: shadow boards for tools, color-coded staging areas, posted changeover sequence cards.
- 5S audits of the changeover staging area on a defined cadence.
- PDCA cycles after every changeover during the pilot phase, with a designated operator capturing lessons immediately after the run.
- Trend data from line monitoring to catch drift before it becomes the new baseline.
What do you need before starting a SMED pilot?
Running a SMED pilot without the right prerequisites in place is the fastest way to produce a one-time result that nobody can repeat. Get these in order first.
Cross-functional pilot team. You need operations, maintenance, QA, and at least one experienced production lead in the room. Assign clear roles: a timekeeper who owns the stopwatch and task log, a QA representative who approves any reclassification of sanitation steps, a maintenance lead who evaluates quick-release hardware options, and an operations manager who owns the pilot scope and success criteria.
Baseline data. Three timed changeover observations on the target line, with every task logged. If you have line monitoring software already installed, pull the equipment cycle data to cross-reference your stopwatch observations. Discrepancies between the two often reveal hidden internal tasks that operators have normalized.
Regulatory and QA prerequisites:
- Current allergen changeover SOP reviewed and approved by QA
- Sanitation protocol documented with minimum contact times and validation criteria
- QA sign-off criteria defined for first-article release after changeover
- FSMA-compliant records plan for the pilot period
Equipment and toolkit:
- Quick-release spare parts for the target changeover (ordered and on-hand before the pilot starts)
- Calibrated torque tools at the line
- Labeled staging area with 5S markings
- PPE appropriate for the sanitation chemicals in use
Governance:
- Pilot scope limited to one line and one product pair
- Executive sponsor identified
- Success criteria defined in advance (e.g., 20% reduction in changeover time within 60 days)
- Weekly review cadence scheduled
Pro Tip: Schedule your SMED pilot changeovers to align with existing planned sanitation windows. You get a realistic baseline that includes the full sanitation cycle, and you avoid the mistake of measuring a "fast" changeover that skipped a required cleaning step.
What does a real SMED result look like in food production?
A published case study of a ready-meal manufacturer applying lean-manufacturing principles, including SMED, produced measurable results across three core KPIs. The facility reduced changeover time by nearly 30%, increased OEE to over 70%, and cut labor costs by approximately 10%.
The table below shows the before-and-after picture from that implementation.
| Metric | Before SMED | After SMED | Change |
|---|---|---|---|
| Changeover time | Baseline (indexed) | ~30% reduction | Significant |
| OEE | Below 70% | Over 70% | Improved |
| Labor cost per changeover | Baseline | ~10% reduction | Reduced |
| Main-line capacity | Baseline | +11% (VSM+SMED study) | Increased |
The narrative behind those numbers matters as much as the figures. In the ready-meal case, the team identified that the sealing head heat-up was starting after the line stopped, adding several minutes to every changeover. Moving that step to external — starting the heat-up during the last production minutes of the prior run — was the single biggest gain. Secondary gains came from pre-staging packaging materials and standardizing the mechanical sequence with a visual job aid.
A separate VSM and SMED study in food processing reduced changeover time substantially and increased main-line capacity, eliminating the need for temporary workers during peak demand periods.
Where monitoring software fits. Accurate baseline measurement is the foundation of any SMED project, and manual stopwatch observations introduce measurement bias — operators perform differently when they know they are being timed, and a single observer cannot capture every parallel task. Real-time equipment monitoring combined with operator input capture reduces that bias by recording machine cycle times automatically and letting operators log events (pre-heat start, QA swab complete, line restart) with timestamps. Gembalabs, for example, combines sensor-based equipment cycle data with staff-reported events to produce a reliable changeover baseline and trend reports that show whether gains are holding week over week. That kind of visibility is what separates a one-time pilot result from a sustained improvement.
Which tools and fixtures actually work on food lines?
The right hardware makes the difference between a streamlined internal task and one that just looks faster on paper. Every quick-change item on a food line has to meet sanitary design requirements, which rules out a lot of the tooling that works fine in automotive or general manufacturing.
Quick-release and modular hardware:
- Quarter-turn clamps and cam-lock fittings for covers, guards, and format parts — rated for food contact and compatible with CIP chemicals
- Modular spindles and quick-change chucks for filling heads, depositors, and portioning equipment
- Pre-staged hoppers and ingredient vessels on wheeled carts with sanitary connectors, ready to swap in without tools
- Color-coded hoses and fittings to prevent cross-connection of ingredients or cleaning chemicals
- Alignment jigs for format parts that must be positioned to a tolerance — jigs eliminate the trial-and-error adjustment time that inflates internal task duration
Material requirements for food lines. All contact-surface tooling should be 316L stainless steel or FDA-compliant polymer (HDPE, UHMW-PE, or Delrin where appropriate). Verify CIP compatibility and chemical resistance for the sanitizers your facility uses — some cam-lock seals degrade with chlorinated alkaline cleaners. Specify IP69K-rated hardware for high-pressure washdown zones.
Poka-yoke examples:
- Keyed connectors on ingredient lines so the wrong product cannot be connected to the wrong hopper
- Color-coded format parts by SKU so operators can confirm correct setup at a glance before the line restarts
- Physical stops or guide pins on format plates that prevent incorrect orientation during installation
- Checklist card holders mounted at the line that require a physical sign-off card to be placed before the start button is accessible
Pro Tip: When specifying quick-release hardware, ask your supplier for the sanitary design certification (3-A Sanitary Standards or EHEDG) and the spare-part lead time. A quarter-turn clamp that takes six weeks to replace after a failure is a maintenance risk, not an efficiency gain.
How do you measure whether SMED is working?
Measurement is where most SMED pilots in food plants fall apart. Teams run a successful pilot changeover, record the time, and declare victory. Six months later, the changeover is back to its original duration because nobody tracked the trend.
The KPIs below give you a complete picture of SMED performance, including food-safety dimensions that pure manufacturing metrics miss.
| KPI | Definition | Measurement method | Baseline example | Short-term target (90 days) |
|---|---|---|---|---|
| Changeover time | Stop-to-start: line stops producing until first good unit of new run | Stopwatch + line monitoring timestamp | 60 minutes | — (30% reduction) |
| OEE | Availability × Performance × Quality | Line monitoring software or manual shift log | <70% | >70% |
| First-pass yield post-changeover | % of units passing QC on first inspection after restart | QA inspection log | Establish baseline | Improve by 5–10 percentage points |
| QA holds per changeover | Number of production holds triggered by QA after changeover | QA hold log | Establish baseline | Reduce by approximately 30% |
| Allergen test pass rate | % of allergen swabs passing on first test after changeover | QA swab records | Establish baseline | Non-negotiable |
| Labor minutes per changeover | Total operator + maintenance minutes logged during changeover | Time study or operator log | Establish baseline | Reduce proportionally with changeover time |
For first-pass yield specifically, changeovers are a high-risk window — the first units after a restart often carry setup defects. Tracking yield separately for the first 15 minutes of a new run gives you a leading indicator of changeover quality that OEE alone misses.
Data collection methods. Stopwatch observations are the starting point, but they have limits: observer effect, parallel-task blind spots, and no automatic trend tracking. Line monitoring sensors capture machine cycle times continuously and without bias. Operator input systems let staff log events with timestamps — a QA swab completion, a pre-heat start, a parts swap — which fills the gaps between sensor readings. The combination gives you a baseline you can defend and a trend line you can act on.
Measurement cadence:
- During pilot: Record every changeover, every time.
- Post-pilot (first 90 days): Weekly review of all KPIs with the cross-functional team.
- Ongoing: Monthly audits comparing current performance to the post-pilot baseline.
What challenges should you expect when running SMED in food plants?
Every SMED implementation in food manufacturing runs into the same set of obstacles. Knowing them in advance lets you build mitigations into the pilot plan rather than discovering them mid-project.
QA and operations tension over sanitation timing. Operations wants to minimize the machine stop; QA needs minimum contact times for sanitizers and allergen validation. Without a pre-agreed protocol, this tension surfaces as a delay on every changeover. Mitigation: establish a written QA response SLA before the pilot starts. Define exactly which steps require QA presence, which can be operator-verified, and what the maximum wait time is for a QA release decision.
Understaffed shifts. SMED often requires parallel task execution — one operator pre-stages while another runs the mechanical sequence. On a lean shift, there may not be a spare person. Mitigation: pilot on a shift with adequate staffing, document the staffing requirement in the standard work, and make the business case for the additional labor using the OEE and capacity data from the pilot.
Inconsistent standard work. The improved changeover sequence exists in a document, but operators run it differently depending on who is on shift. Mitigation: visual job aids at the line, not in a binder. One-page laminated cards with photos, mounted at the changeover station. Pair new operators with trained leads for the first five changeovers after training.
Hidden internal tasks. Pre-heating, chemical prep, and paperwork completion often happen during the machine stop without appearing on any task list because operators have always done it that way. Mitigation: film three changeovers before the pilot, not one. Hidden tasks show up on video that a single observer misses.
Supply delays for spare parts. Quick-release hardware ordered for the pilot arrives after the pilot date. Mitigation: order spares with a lead-time buffer of at least four weeks, and keep a pre-approved spare kit at the line once the pilot is complete.
Pro Tip: Run a five-minute daily huddle at the line during the pilot phase. Post the changeover time from the previous day on a visible board. Teams that can see their own performance trend maintain momentum; teams that only hear about it in monthly meetings revert.
Your line changeover checklist for a SMED pilot
This checklist covers the three phases of a changeover. Print it, laminate it, and mount it at the line. One operator owns the timekeeper role; one owns the lessons log.
Pre-changeover (while line is still running)
- Confirm next product batch record is printed and reviewed.
- Stage all ingredients, packaging, and labels for the next run in the designated staging area.
- Pre-heat sealing heads, ovens, or other temperature-dependent equipment to target spec.
- Mix sanitation chemicals to correct concentration and label containers.
- Confirm spare parts and changeover tools are in the designated kit at the line.
- Notify QA of changeover start time and confirm QA representative availability.
- Confirm operator roles: timekeeper, mechanical lead, QA liaison, sanitation lead.
- Review allergen changeover SOP and confirm allergen status of incoming product.
During changeover (line stopped)
- Timekeeper starts stopwatch at line stop.
- Safety lockout/tagout completed and verified by mechanical lead.
- Sanitation sequence executed per SOP, with contact times observed.
- Allergen swab taken at required contact points; QA logs timestamp.
- Mechanical part swaps completed in sequence per visual job aid.
- Ingredient and packaging changeover completed; connections verified against color-code guide.
- QA first-article inspection scheduled; batch record updated.
- All tasks logged with start and end times on the changeover task sheet.
Post-changeover (line restarted)
- Test run completed; first units inspected for weight, temperature, and visual defects.
- QA releases first-article; release timestamp logged.
- Clean-as-you-go tasks completed; staging area returned to 5S standard.
- Changeover time recorded in the baseline log.
- Lessons log completed by designated operator: what went as planned, what did not, and one suggested improvement.
Sample timing template:
| Task | Start | End | Duration (min) | Internal / External |
|---|---|---|---|---|
| Pre-heat sealing head | Before stop | Line stop | — | External |
| Lockout/tagout | — | — | 3 | Internal |
| CIP cycle | — | — | 15 | Internal |
| Allergen swab + QA hold | — | — | 10 | Internal |
| Mechanical part swap | — | — | 10 | Internal |
| First-article inspection | — | — | 7 | Internal |
Pro Tip: The lessons log is not optional paperwork. Require the designated operator to complete it within 10 minutes of line restart, while the details are fresh. A single honest note — "the allergen swab kit was in the wrong location, added 4 minutes" — is worth more than a formal post-mortem two weeks later.
Key Takeaways
SMED in food manufacturing delivers its largest gains when sanitation, allergen controls, and mechanical changeover tasks are planned together as a single integrated sequence, not treated as separate workstreams.
| Point | Details |
|---|---|
| Measure before you change anything | Time three complete changeovers and log every task before reclassifying a single step. |
| Protect food-safety steps | Allergen validation and CIP cycles often cannot be externalized; get QA sign-off before converting any sanitation task. |
| Target the biggest internal tasks first | Pre-heating sealing heads and pre-staging ingredients are typically the highest-ROI conversions on food lines. |
| Track beyond changeover time | Monitor OEE, first-pass yield post-changeover, QA holds, and allergen swab pass rate to get the full picture. |
| Gembalabs supports measurement and sustained gains | Gembalabs combines sensor-based equipment cycle data with operator event logs to build reliable baselines and track whether SMED improvements hold over time. |
The part of SMED that most food plants get wrong
The conventional wisdom on SMED in food is that the methodology is straightforward and the hard part is just getting started. That framing underestimates the real obstacle, which is not the first pilot but the 90 days after it.
Most food plants can run a successful pilot changeover. The team is motivated, the timekeeper is diligent, the QA rep shows up on time, and the pre-staged ingredients are exactly where they should be. The changeover comes in 25% faster than baseline and everyone feels good about it. Then the timekeeper gets reassigned, the staging area slowly fills with unrelated items, and the allergen swab kit migrates back to the QA office. Three months later, the changeover is running at the old time again, and nobody can explain exactly when it drifted back.
The fix is not more training. It is making the improved process the path of least resistance. Visual controls at the line, a staging area that physically cannot hold anything except changeover materials, and a daily number on a visible board that tells the team whether yesterday's changeover was better or worse than the week before. When operators can see their own trend, they self-correct. When the data lives in a spreadsheet that a manager reviews monthly, drift is invisible until it is already the new normal.
The other thing most guides underestimate is the QA response SLA. Operations can execute a perfect mechanical sequence in 20 minutes and then wait 15 minutes for a QA release decision. That wait is internal time. It shows up in the changeover clock. If QA is not part of the SMED team from day one, with a defined maximum response time written into the standard work, the mechanical gains will always be partially offset by release delays. Get that agreement in writing before the pilot starts.
Gembalabs helps you measure and sustain SMED gains
Cutting changeover time is one thing. Knowing whether the improvement is holding three months later is another problem entirely, and it is the one that most food plants solve poorly.
Gembalabs is built for exactly this situation. The software connects to your equipment sensors to capture cycle times automatically, and it gives operators a simple interface to log events — pre-heat start, QA swab complete, line restart — with timestamps. Those two data streams combine into a changeover baseline that is more accurate than a stopwatch study and a trend report that shows you, shift by shift, whether your SMED gains are holding or drifting. The AI-generated reports flag recurring issues by name: if the allergen swab hold is adding time on Tuesday night shifts but not Monday mornings, the report surfaces that pattern before it becomes a chronic problem. Bilingual support in English and Spanish means your entire team can log events in the language they work in, which removes a common barrier to consistent data capture on mixed-language production floors.
For small and mid-sized food manufacturers who cannot afford a dedicated lean engineer to watch every changeover, Gembalabs gives you the visibility that makes SMED self-sustaining. See how the intelligence dashboard works and request a demo to review example changeover reports for your line type.
Useful sources for further reading
The claims and case data in this article draw from the following published sources. Each is worth reading in full if you are building a formal SMED business case or training materials.
- Optimising Changeover through Lean-Manufacturing Principles: A Case Study in a Food Factory — The MDPI peer-reviewed case study covering the ready-meal manufacturer's 30% changeover reduction, OEE improvement, and labor cost findings. The most directly applicable published evidence for food SMED pilots.
- The Benefits of Rapid Changeover in a Food Processing Facility — Food Safety Magazine's practical treatment of SMED steps, sanitation integration, and allergen changeover constraints. Good reference for QA teams who need to understand why certain steps cannot be externalized.
- A Case Study of VSM and SMED in the Food Processing Industry — The VSM and SMED combined study showing 34% changeover reduction and 11% capacity increase. Useful for making the capacity and labor-cost business case to leadership.
- Application of Single Minute Exchange of Die Tool in a Food Industry Company to Eliminate Waste — Conference paper documenting a 39% changeover time reduction with throughput and safety improvements.
- Gembalabs blog: Standard Work Manufacturing — Applied guide to standardizing changeover work in food production, with practical templates for food manufacturers.